


This guide explains how to install WordPress from inside your AdminBolt Client Panel.
Step 1 – Open AdminBolt #
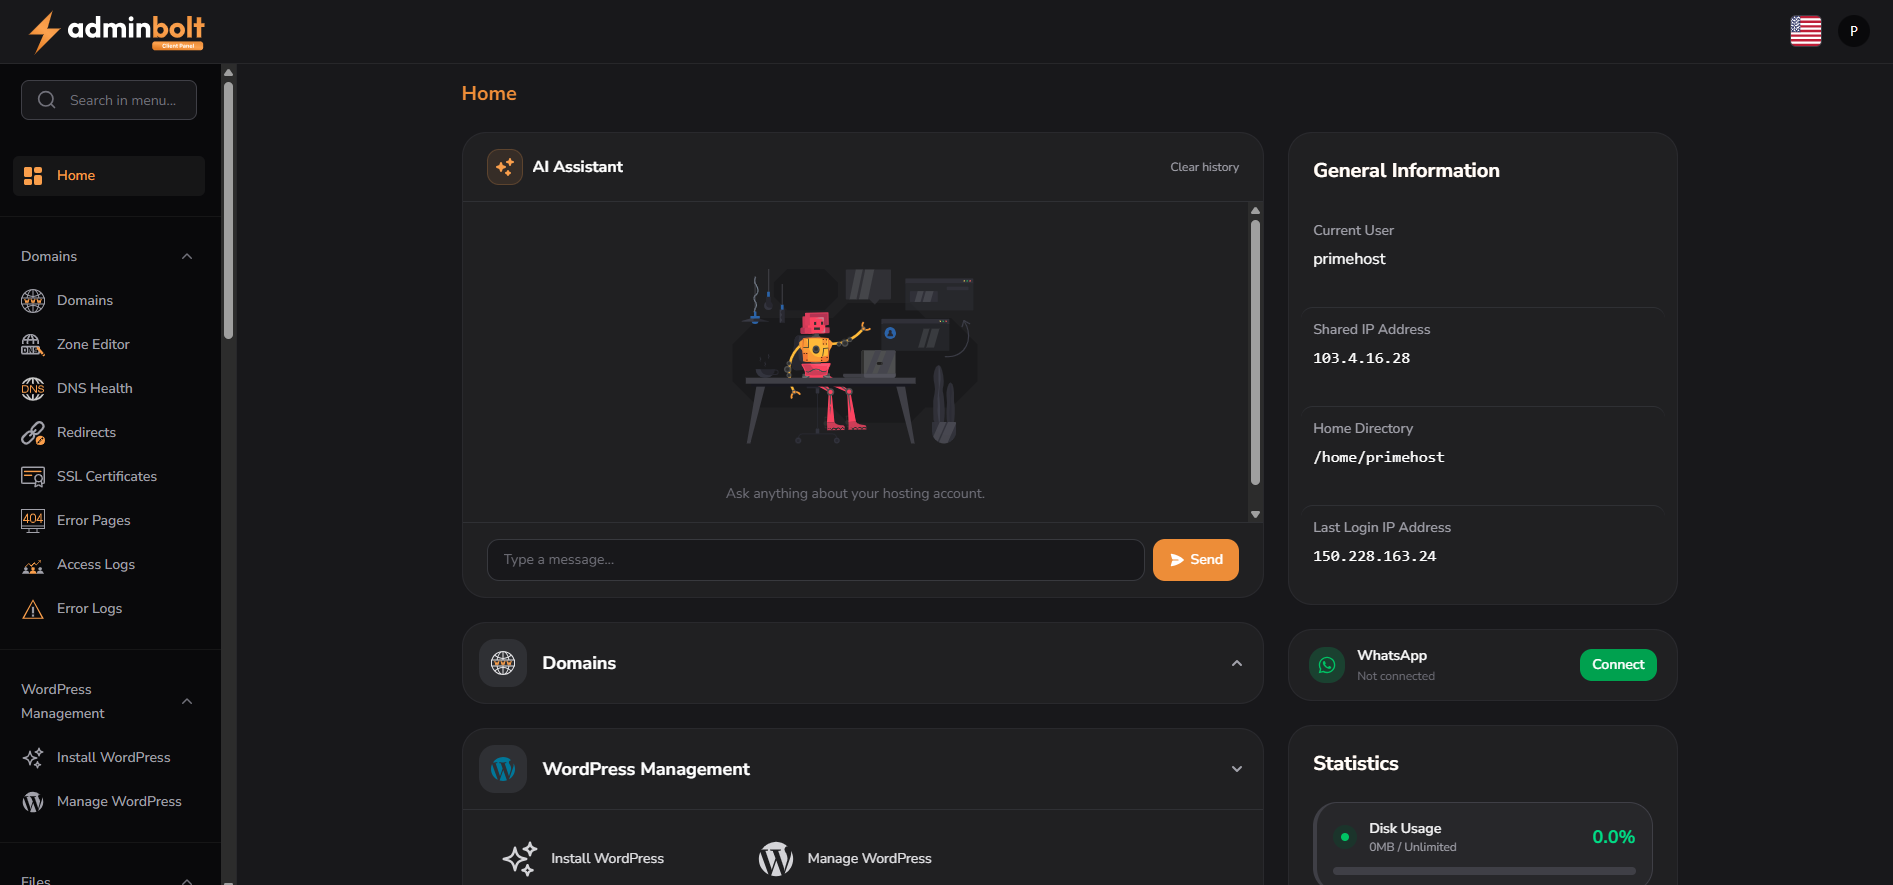
Log in to your AdminBolt Client Panel. From the Home screen, locate the WordPress Management section.
Step 2 – Click Install WordPress #
In the left menu, open WordPress Management, then click Install WordPress.
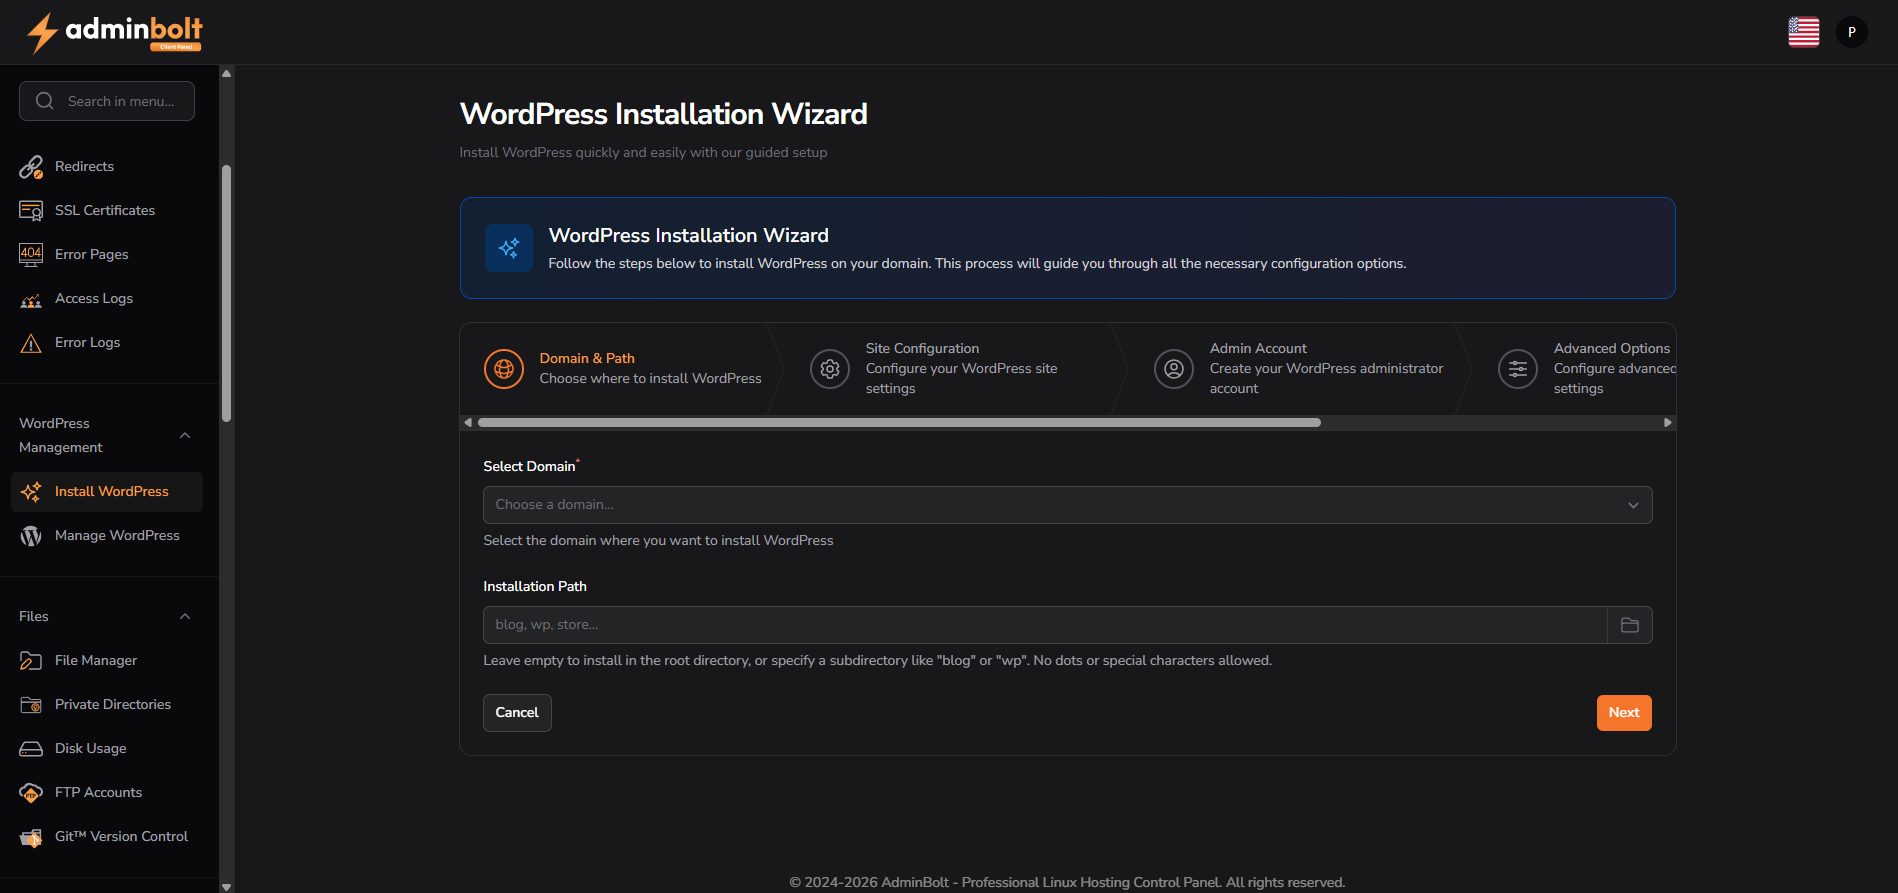
Step 3 – Select the Domain and Installation Path #
Select the domain you want to install WordPress on.
In the Installation Path field:
- Leave it blank to install WordPress directly on the main domain.
- Enter a folder name, such as blog, to install WordPress in a subdirectory.
Click Next.
Step 4 – Enter Site Details #
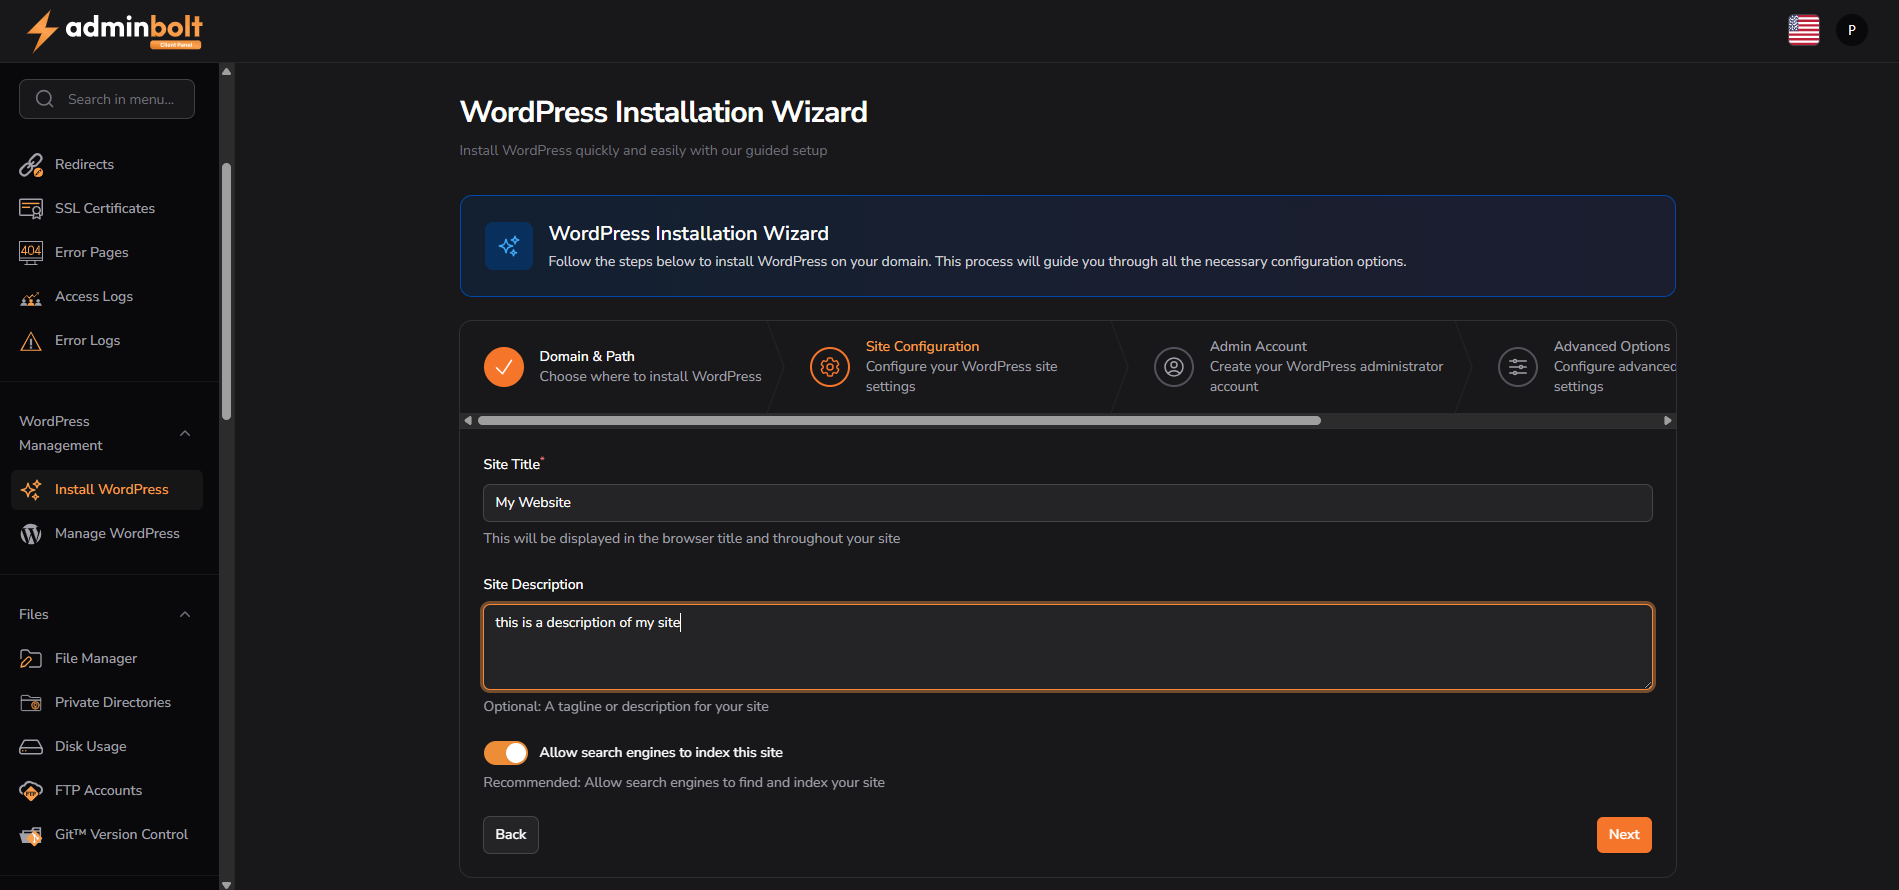
Enter your website details:
- Site Title – the name of your website.
- Site Description – a short description or tagline for your website.
- Allow search engines to index this site – leave this enabled if you want Google and other search engines to find your site.
Click Next.
Step 5 – Create the WordPress Admin Account #
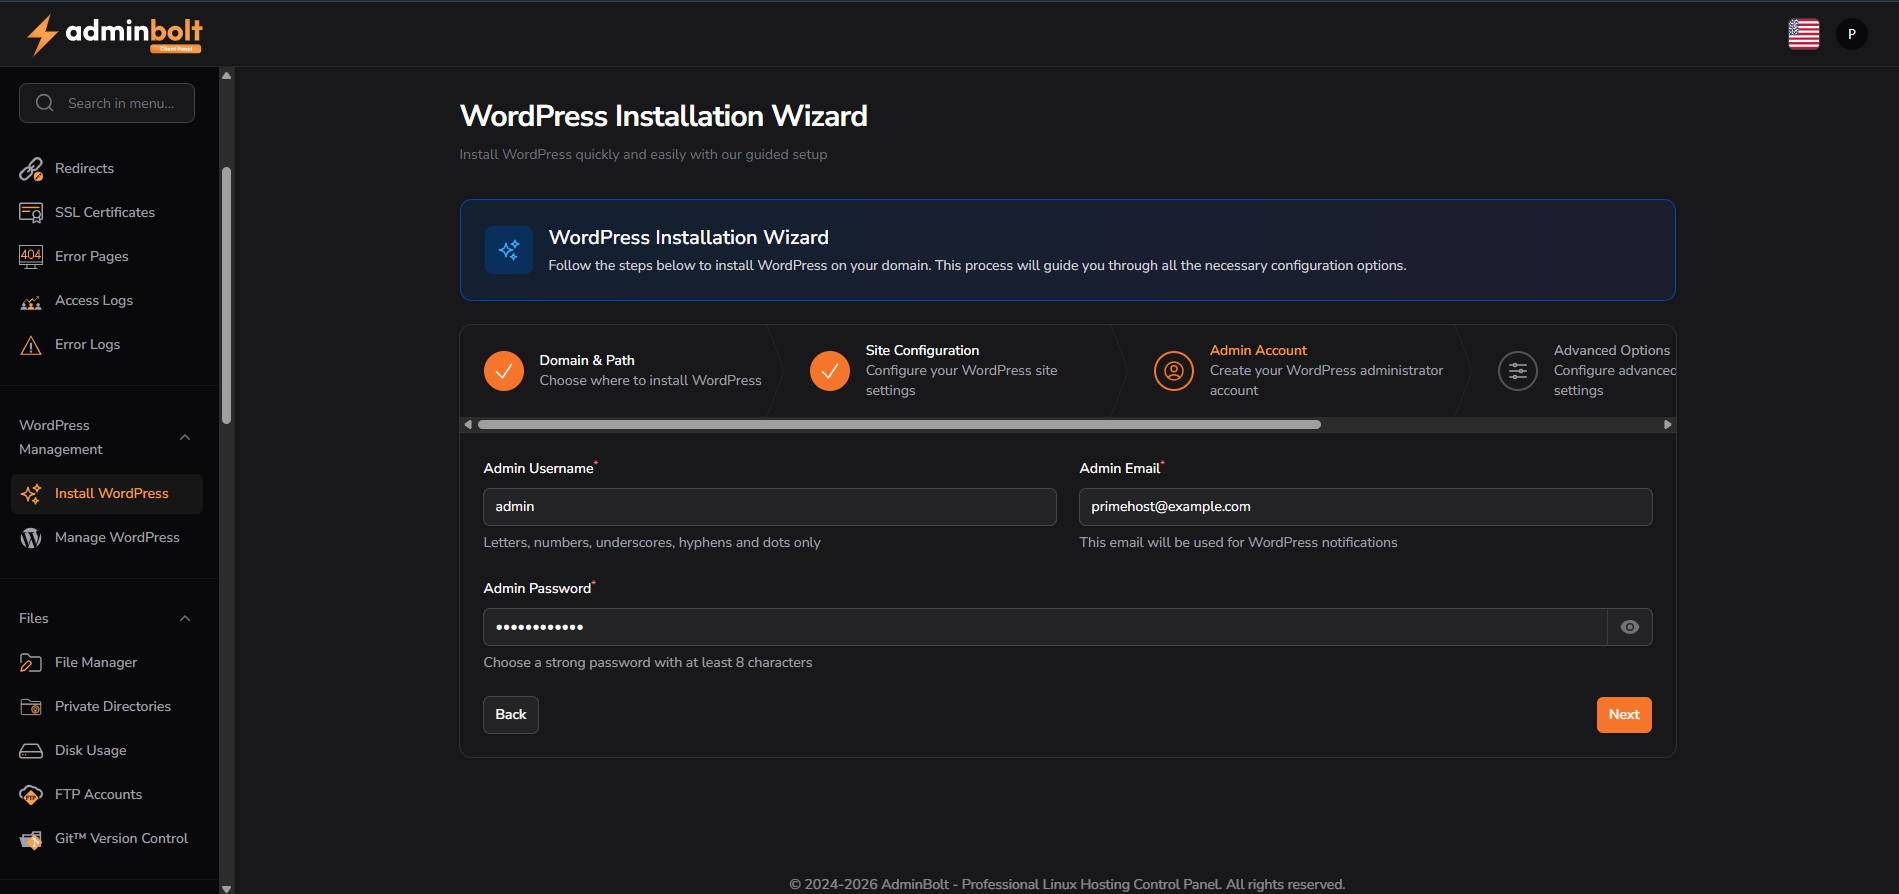
Enter the WordPress administrator login details:
- Admin Username
- Admin Email
- Admin Password
Keep these details safe, as they are used to log in to your WordPress admin dashboard.
Click Next.
Step 6 – Choose Advanced Options #
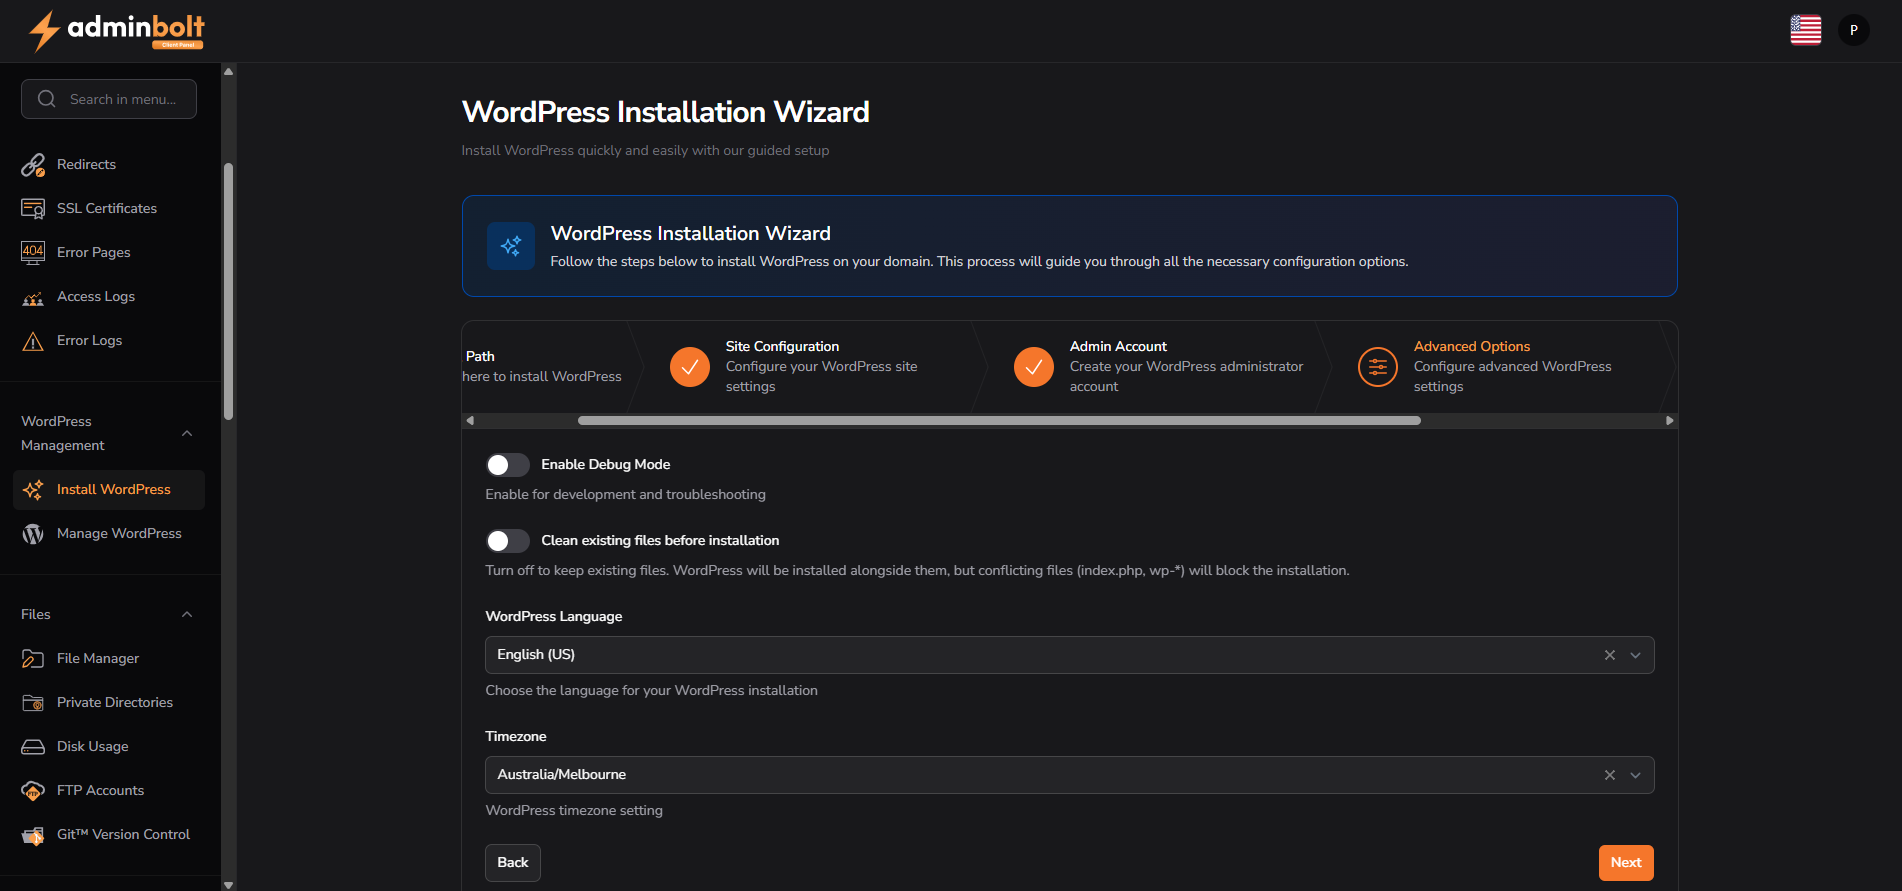
On the Advanced Options screen, you can select the WordPress language and timezone.
Most Australian users should select:
- Language: English (US)
- Timezone: Australia/Melbourne, or your local timezone
The Clean existing files before installation option should normally be left disabled unless you specifically want to remove existing files in the installation directory.
Click Next.
Step 7 – Review and Install #
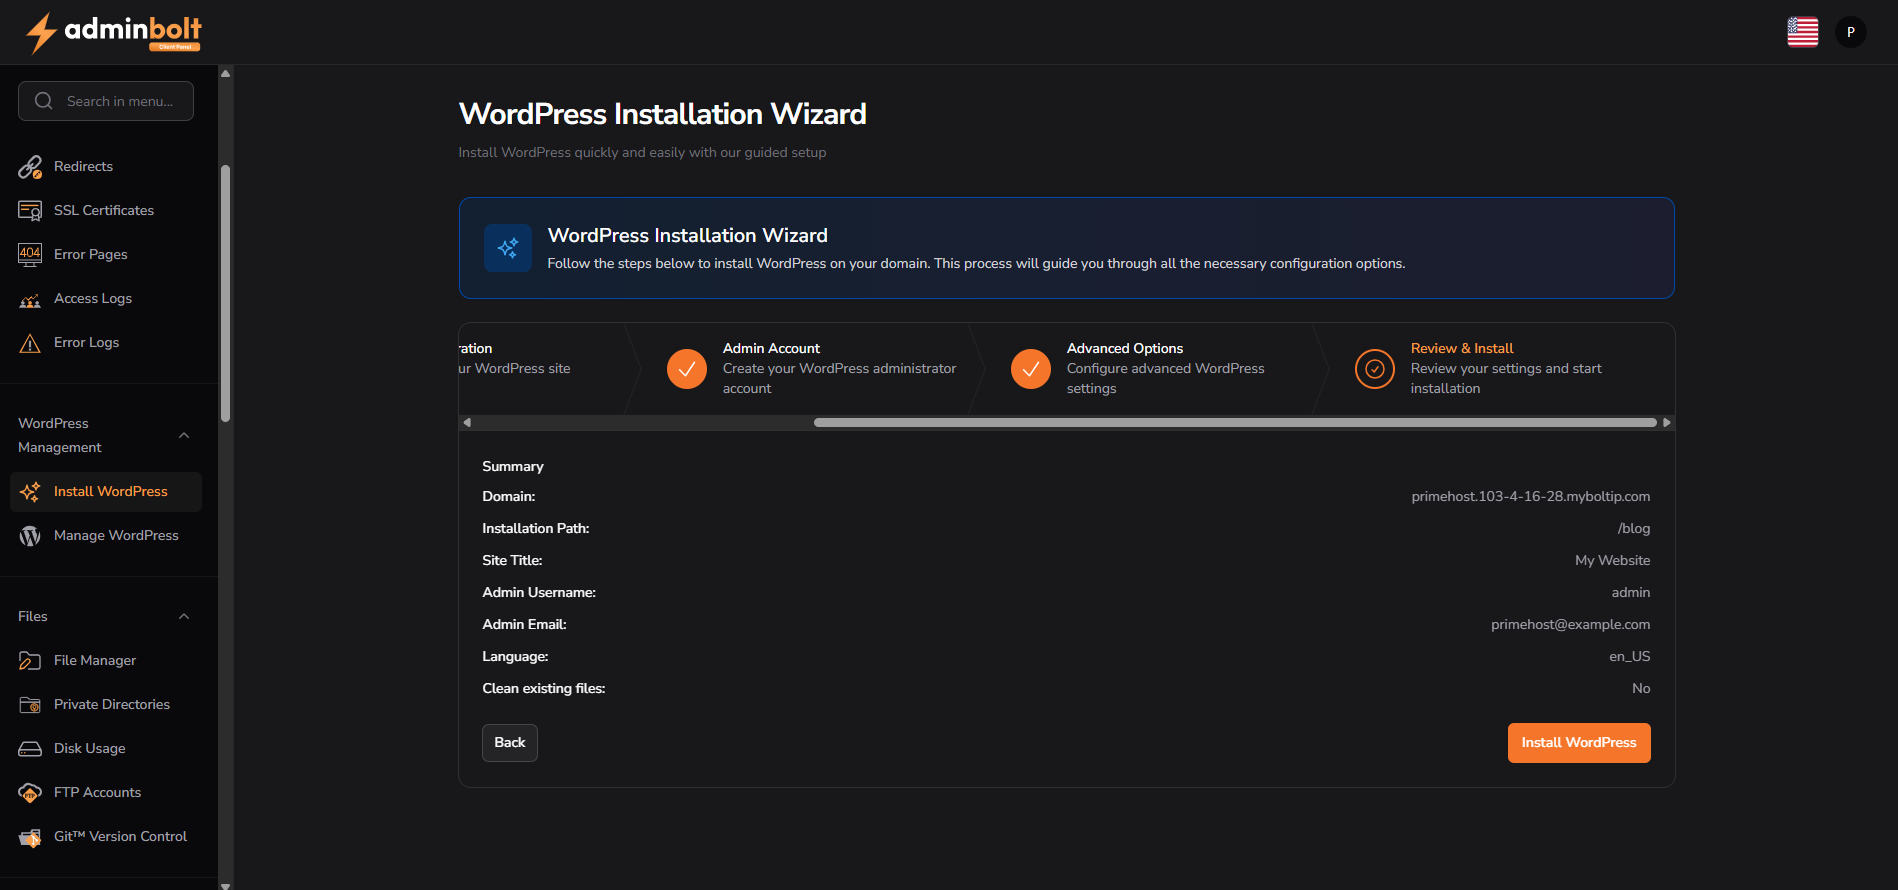
Review the installation summary carefully.
Check that the following details are correct:
- Domain
- Installation path
- Site title
- Admin username
- Admin email
- Language
When ready, click Install WordPress.
Step 8 – Wait for Installation to Complete #
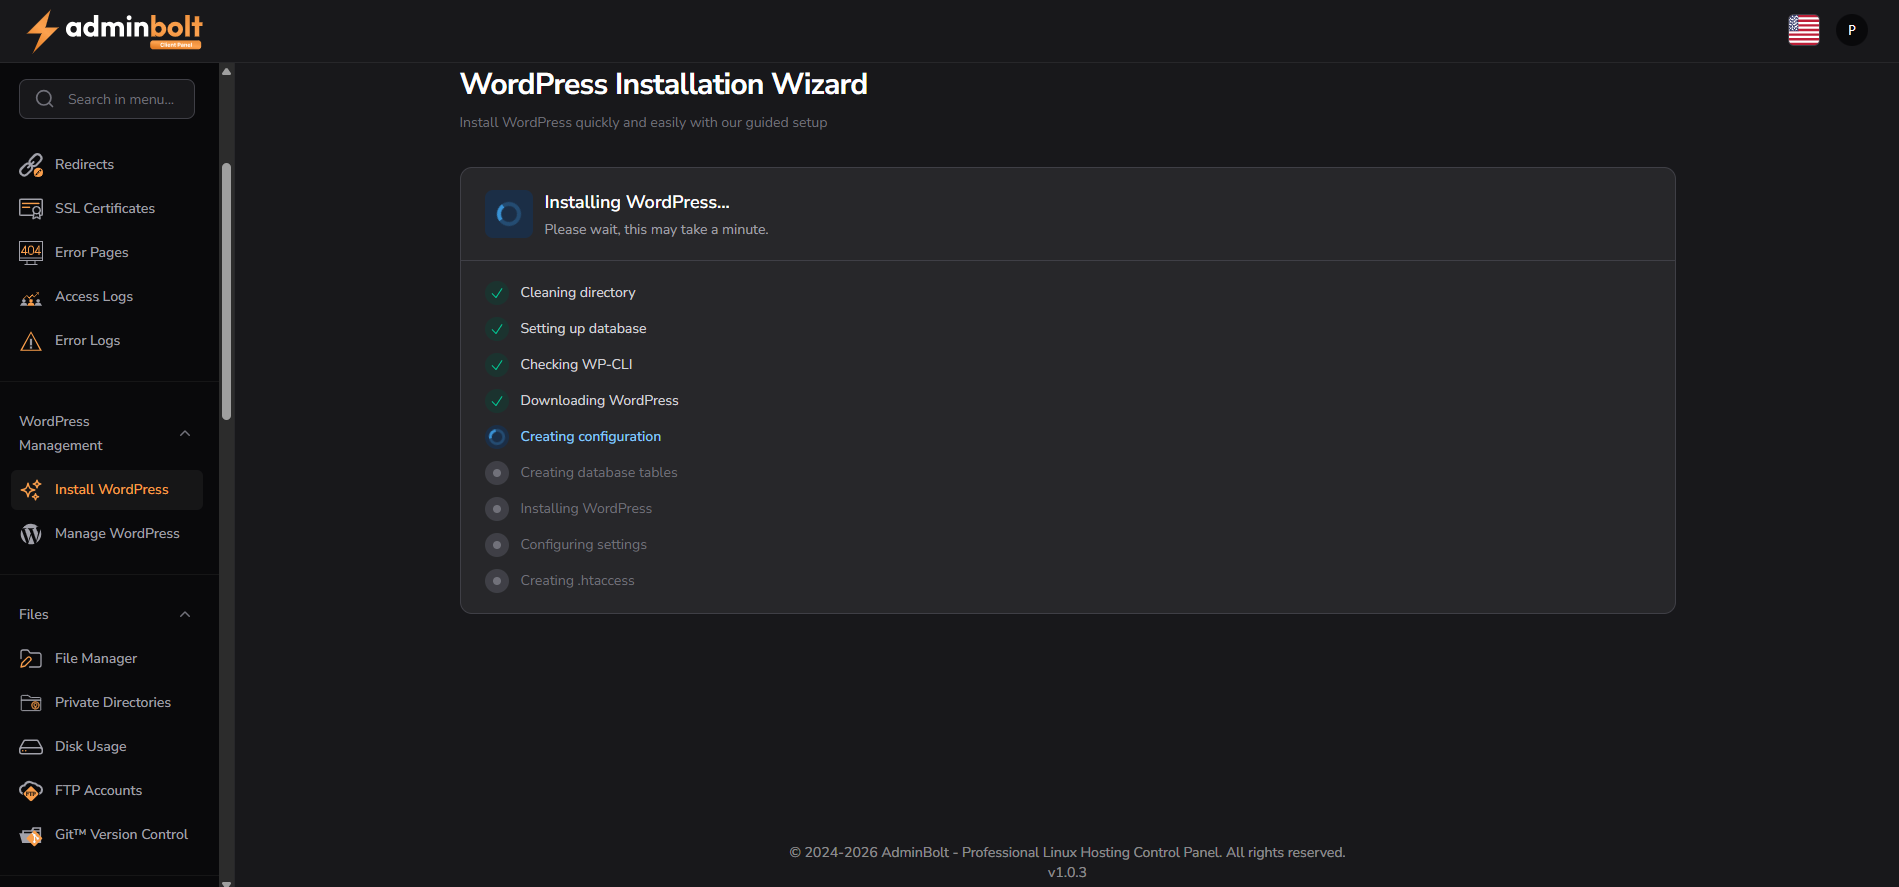
AdminBolt will now install WordPress. This may take a minute.
The installer will complete several tasks, including:
- Cleaning the directory, if selected
- Setting up the database
- Checking WP-CLI
- Downloading WordPress
- Creating the WordPress configuration
- Creating database tables
- Configuring WordPress settings
Step 9 – Installation Completed #
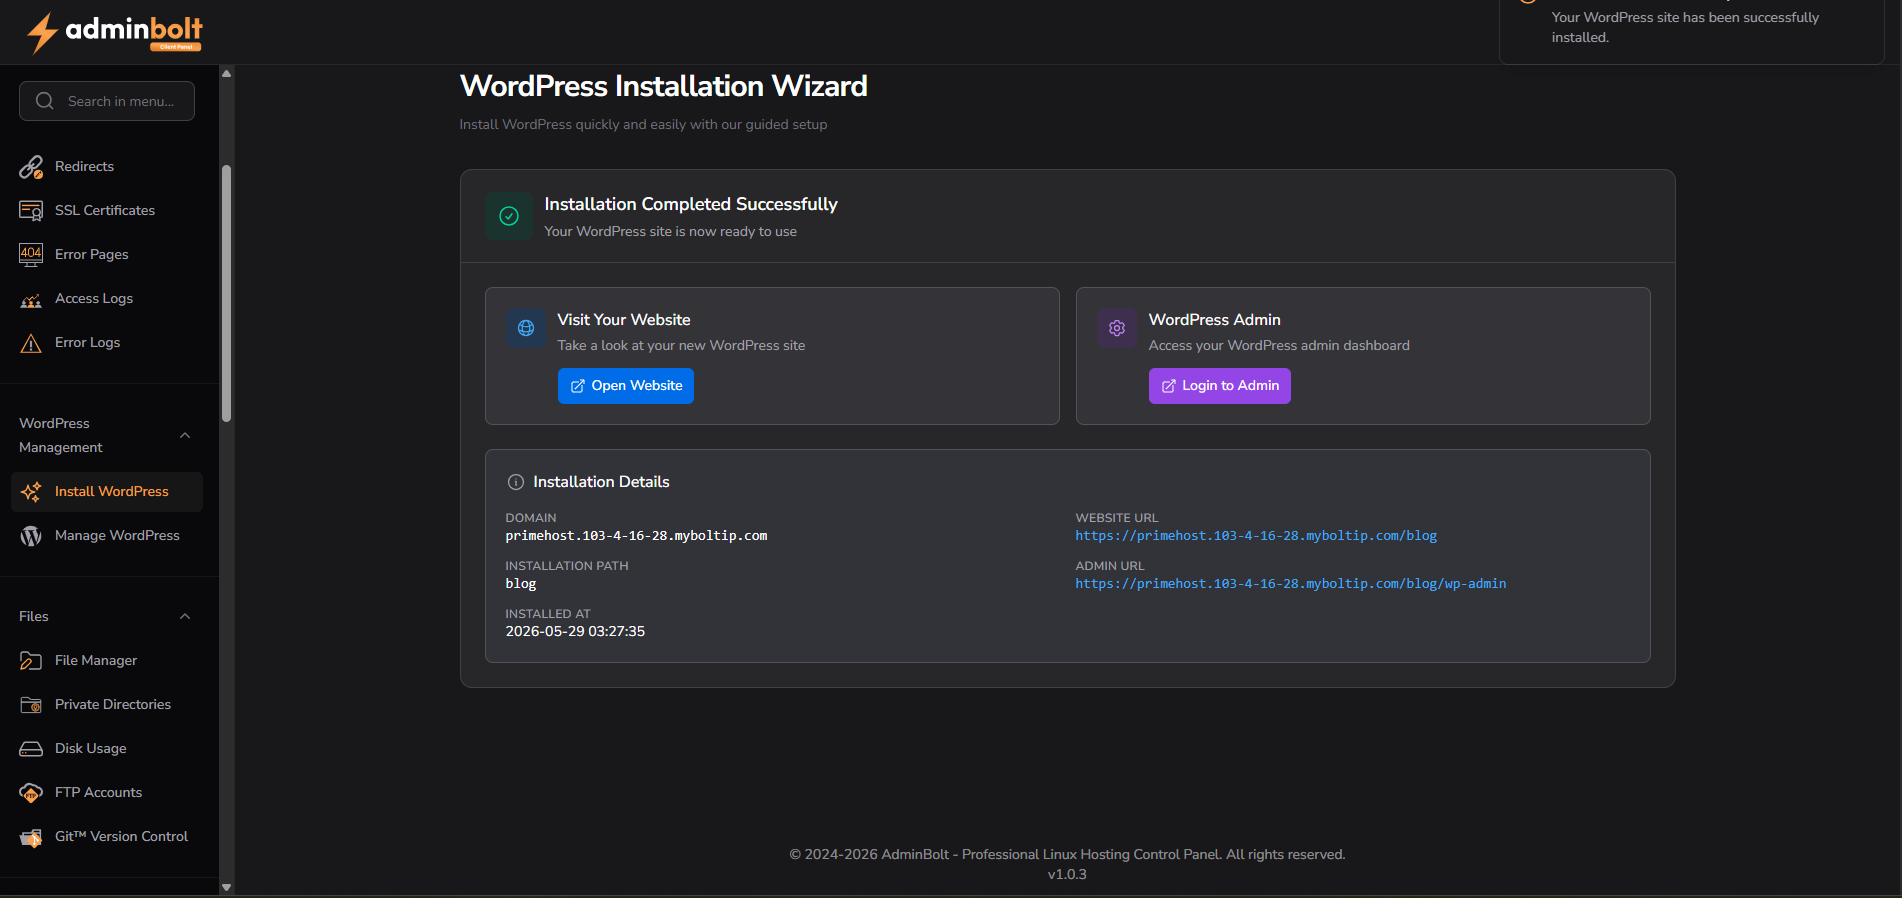
Once the installation has completed, AdminBolt will show a confirmation screen.
From here you can:
- Click Open Website to view your new WordPress website.
- Click Login to Admin to access your WordPress dashboard.
Need Help? #
If you are unsure which options to choose, or if your WordPress installation does not complete successfully, please contact our support team for assistance.


